Pumpkin pie lovers, gather ’round! If you’re a fan of rich, creamy desserts and crave something with a little flair, you’re in for a treat. The Milk Bar Pumpkin Pie Recipe isn’t just another holiday dessert—it’s a game-changer. With its oat cookie crust and silky pumpkin ganache filling, it’s the kind of pie that makes people ask, “Wait, you made this?” Whether you’re a seasoned baker or just someone looking to impress your family during Thanksgiving, this guide has got your back. We’ll cover everything from the origin of this iconic pie to step-by-step instructions, serving tips, and even troubleshooting advice. So, roll up your sleeves and let’s dive in!
Introduction to the Milk Bar Pumpkin Pie Recipe
Why the Milk Bar Pumpkin Pie Recipe Is a Game-Changer
When it comes to pumpkin pie, the Milk Bar Pumpkin Pie Recipe takes tradition and gives it a bold, creative twist. Forget the classic pie crust and plain filling; this pie elevates the game with its oat cookie crust and decadent pumpkin ganache. It’s not just a dessert—it’s an experience. Each bite balances creamy richness, warm spices, and a satisfyingly crunchy crust.
What truly makes this recipe stand out is its modern approach to a nostalgic favorite. While it stays true to the comforting flavors of a traditional pumpkin pie, it dares to be different, offering a dessert that’s as unique as it is delicious. Plus, it’s easier to make than it looks, which means you can impress friends and family without breaking a sweat. Trust me, once you’ve tried the Milk Bar Pumpkin Pie Recipe, you won’t go back to the old-school version.
The Origin Story of This Unique Pumpkin Pie
The Milk Bar Pumpkin Pie Recipe comes from the innovative mind of Christina Tosi, founder of Milk Bar. Known for transforming desserts into playful creations (hello, cereal milk ice cream), Tosi has a knack for making treats that are both nostalgic and inventive. This pumpkin pie is no exception. Drawing on seasonal flavors and cozy childhood memories, she reimagined the classic dessert with a signature Milk Bar twist.
What sets this pie apart is its oat cookie crust—a nod to Milk Bar’s love for unconventional ingredients—and the luxurious pumpkin ganache filling. It’s no wonder this pie has become a holiday favorite for those who want something a little extra special. Whether you’re a Milk Bar devotee or new to their creations, this recipe is sure to wow your taste buds and win over any crowd.
Ingredients for the Milk Bar Pumpkin Pie Recipe
Essential Ingredients for a Perfect Milk Bar Pumpkin Pie Recipe
Making the Milk Bar Pumpkin Pie Recipe is all about balancing flavors and textures. Here’s a breakdown of the key ingredients that make this dessert so special:
- Oat Cookie Crust:
This crust is a game-changer, made from crushed oat cookies combined with melted butter. It’s rich, nutty, and provides the perfect foundation for the pie. You can use store-bought oat cookies or make them from scratch if you’re feeling ambitious. - Pumpkin Ganache Filling:
The star of the show! The filling combines pumpkin puree, white chocolate, heavy cream, and a medley of warm spices like cinnamon, nutmeg, and ginger. Together, they create a creamy, flavorful layer that tastes like the essence of fall. - Spices:
Ground cinnamon and nutmeg are non-negotiable for that warm, comforting flavor. A pinch of ground ginger adds a subtle kick that rounds out the spice profile beautifully. - Toppings (Optional):
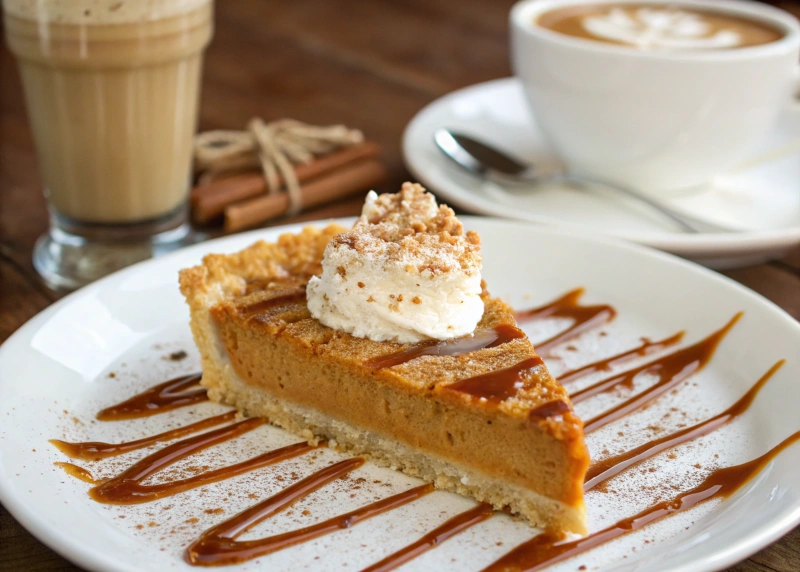
Whipped cream, a dusting of cinnamon, or a drizzle of caramel can add an extra layer of indulgence.
How to Select the Best Ingredients for Your Milk Bar Pumpkin Pie
Choosing high-quality ingredients is key to achieving the best version of the Milk Bar Pumpkin Pie Recipe. By the way, if you’re looking for other dessert ideas with unique ingredients, check out our Kefir Sheet Cake Recipe for a tangy twist on classic cakes.
- Pumpkin Puree:
Go for 100% pure pumpkin puree—not pumpkin pie filling. The latter contains added sugar and spices that can throw off the recipe. Brands like Libby’s are a reliable choice for their smooth texture and rich flavor. - White Chocolate:
Use high-quality white chocolate for the ganache. Cheap options can taste overly sweet or artificial. Look for brands like Ghirardelli or Valrhona to ensure a creamy, smooth filling. - Oat Cookies:
While store-bought oat cookies save time, homemade ones can elevate the flavor. If you’re buying, pick cookies with a buttery, slightly sweet profile. - Spices:
Freshly ground spices make a noticeable difference. Pre-ground spices lose potency over time, so if your cinnamon has been sitting in the pantry for years, it’s time for an upgrade.
By starting with the best ingredients, you’ll set yourself up for success. The result? A Milk Bar Pumpkin Pie Recipe that’s as stunning as it is delicious. Onward to the next step: bringing it all together! 🍂

Step-by-Step Guide to Making the Milk Bar Pumpkin Pie Recipe
Crafting the Oat Cookie Crust for Your Pumpkin Pie
- Prepare the Oat Cookie Base:
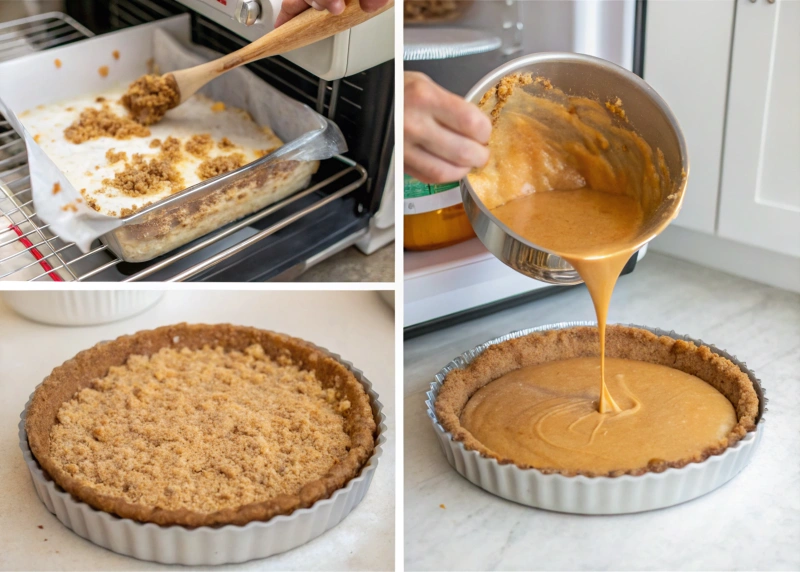
Start by crushing oat cookies into fine crumbs. You can use a food processor for an even texture or place the cookies in a zip-top bag and crush them with a rolling pin if you want a more hands-on approach. - Mix with Butter:
Melt unsalted butter and combine it with the cookie crumbs in a bowl. Stir until the mixture resembles wet sand and holds together when pressed. - Press into the Pan:
Transfer the crust mixture into a 9-inch pie pan. Use a flat-bottomed glass or measuring cup to press the mixture evenly across the bottom and up the sides of the pan. Ensure a compact crust to avoid crumbling when sliced. - Chill the Crust:
Place the crust in the refrigerator or freezer for at least 15–20 minutes to set while you prepare the filling.
How to Prepare the Pumpkin Ganache Filling for Milk Bar’s Pie
- Combine the Base Ingredients:
In a medium saucepan, add pumpkin puree, heavy cream, and white chocolate. Heat the mixture over low heat, stirring constantly, until the white chocolate has melted and the mixture is smooth. - Add Spices:
Remove the pan from heat and stir in ground cinnamon, nutmeg, and a pinch of ginger. Adjust the spice level to your preference—this is where the cozy fall flavors really come to life! - Cool the Ganache:
Allow the mixture to cool slightly before assembling the pie. This prevents the warm filling from melting the crust.
Assembling and Chilling the Milk Bar Pumpkin Pie Recipe
- Pour the Filling:
Once the ganache has cooled, pour it into the chilled crust. Use a spatula to spread the filling evenly across the surface. - Smooth the Top:
For a polished look, gently tap the pie pan on the counter to remove any air bubbles. You can also use an offset spatula to smooth the top. - Chill to Set:
Refrigerate the assembled pie for at least 4–6 hours, or preferably overnight. This allows the ganache to firm up, making it easier to slice and serve.
Serving the Milk Bar Pumpkin Pie Recipe
- Add Final Touches:
Before serving, add optional toppings like a dollop of whipped cream, a drizzle of caramel, or a light dusting of cinnamon. For a decorative flair, sprinkle crushed oat cookies or candied ginger pieces on top. - Slice and Enjoy:
Use a sharp knife to cut clean slices. To make slicing easier, dip the knife in hot water and wipe it clean between cuts.
And that’s it! You’ve just mastered the Milk Bar Pumpkin Pie Recipe. Serve it up and watch everyone swoon over this one-of-a-kind dessert. 🍂 🥧
Tips and Tricks for the Milk Bar Pumpkin Pie Recipe
Common Mistakes to Avoid While Making the Milk Bar Pumpkin Pie
Even the best bakers can face hiccups when tackling the Milk Bar Pumpkin Pie Recipe. Here are some pitfalls to steer clear of:
- Skipping the Chill Time:
The crust and pie both need time to set in the refrigerator. If you rush this step, the crust might crumble, and the filling won’t hold its shape. Patience pays off! - Overmixing the Ganache:
Stir the filling just enough to combine the ingredients. Overmixing can incorporate air bubbles, leading to a less smooth texture. - Using Low-Quality Ingredients:
Since this recipe has simple components, the quality of each ingredient matters. Opt for premium white chocolate and fresh spices to get that signature flavor. - Overheating the Ganache:
White chocolate can scorch easily, so keep the heat low and stir constantly when making the filling.
Want to try your hand at more creative baking? Alongside this pie, you might love our Madeline Cookies Recipe Using Cream, a delicate treat with a luxurious texture.
Flavor Enhancements for Your Milk Bar Pumpkin Pie Recipe
Want to take your pie to the next level? Try these flavor-boosting tips:
- Brown Butter Crust:
Brown the butter before mixing it with the oat cookie crumbs. This adds a nutty, caramel-like depth to the crust. - Spice it Up:
Customize your spice blend by adding cardamom or cloves. A pinch of cayenne pepper can also add a subtle, surprising kick. - Citrus Zest:
Grate a bit of orange or lemon zest into the ganache for a refreshing contrast to the richness.

Serving Ideas for the Milk Bar Pumpkin Pie Recipe
Perfect Pairings for the Milk Bar Pumpkin Pie
The Milk Bar Pumpkin Pie Recipe is a standout dessert, but the right pairing can make it even more special:
- Whipped Cream: A light dollop balances the rich ganache filling perfectly.
- Vanilla Ice Cream: Serve a scoop alongside a warm slice for a classic combination.
- Spiced Latte or Tea: A chai latte or spiced black tea complements the pumpkin and cinnamon flavors beautifully.
Festive Presentation Tips for the Milk Bar Pumpkin Pie Recipe
Make your pie table-ready with these simple yet effective presentation ideas:
- Cinnamon Dusting:
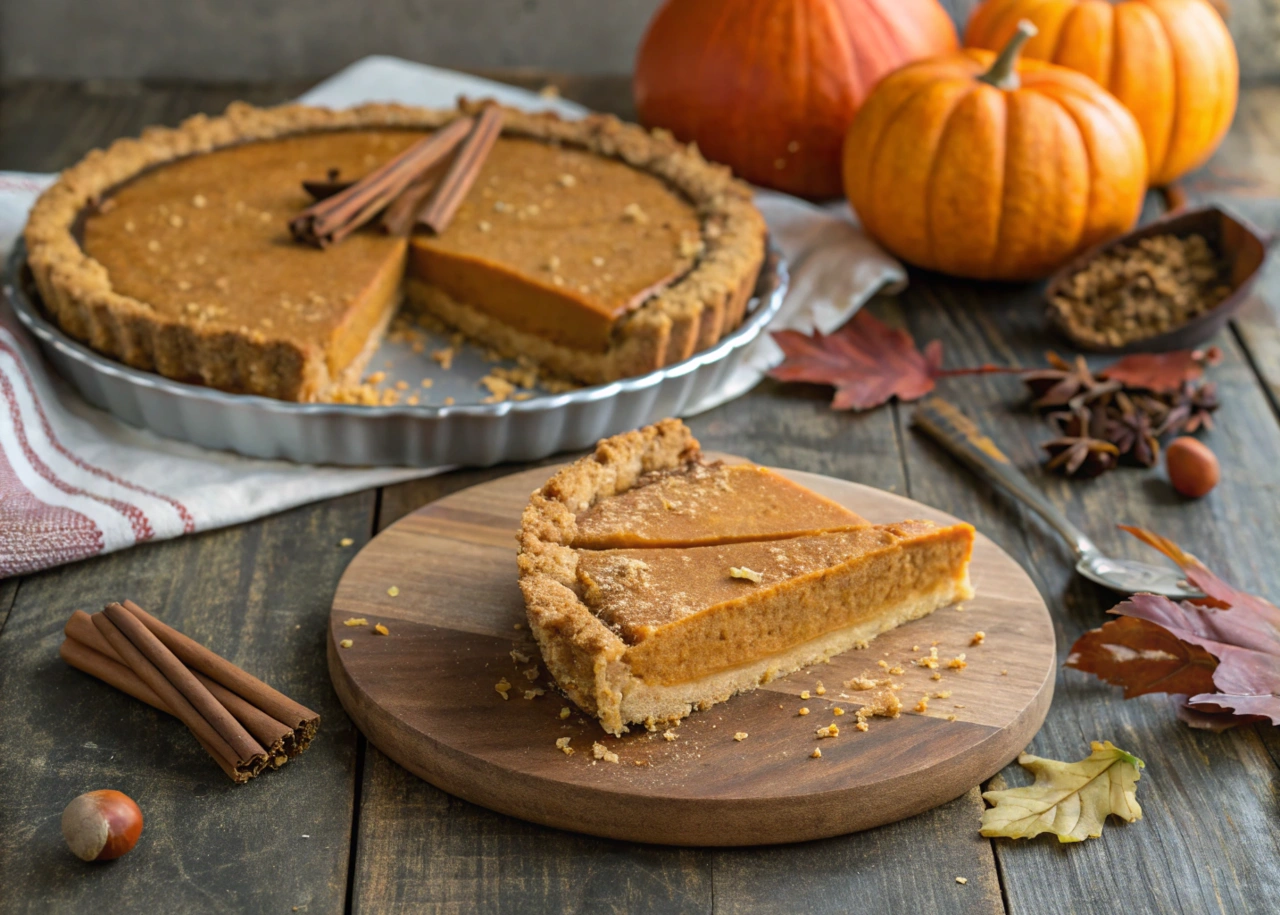
Lightly dust the top of the pie with cinnamon or nutmeg for a festive touch. - Decorative Edges:
Use the back of a fork or a spoon to create patterned edges on the crust before chilling. - Seasonal Toppings:
Add sugared cranberries, edible gold flakes, or chocolate curls for a holiday-themed pie. - Pie Platter:
Place the pie on a decorative serving plate and garnish the edges with small sprigs of rosemary or thyme.
FAQs About the Milk Bar Pumpkin Pie Recipe
Can You Make the Milk Bar Pumpkin Pie Recipe in Advance?
Yes, and it’s actually better to make it ahead! The Milk Bar Pumpkin Pie Recipe needs to chill for several hours to set properly, making it an ideal make-ahead dessert. You can prepare it up to two days in advance and store it in the refrigerator. This also gives the flavors time to meld together beautifully.
If you’re hosting a large event, you can even freeze the pie. Wrap it tightly in plastic wrap and aluminum foil, then thaw in the refrigerator overnight before serving.
Storage Tips for the Milk Bar Pumpkin Pie Recipe
Storing leftovers (if there are any!) is easy:
- In the Refrigerator: Cover the pie with plastic wrap or place it in an airtight container. It’ll stay fresh for up to 5 days.
- In the Freezer: For longer storage, slice the pie into individual servings, wrap each slice in plastic wrap, and place them in a freezer-safe bag or container. It can be frozen for up to 2 months.
For reheating, individual slices can be warmed in the microwave for 10–15 seconds or in the oven at 300°F for about 10 minutes. This softens the filling while keeping the crust crisp.
Conclusion
Why the Milk Bar Pumpkin Pie Recipe Is a Must-Try
The Milk Bar Pumpkin Pie Recipe is more than just a dessert—it’s an experience. From its crumbly oat cookie crust to its silky pumpkin ganache filling, every bite is a celebration of creativity and flavor. Whether you’re making it for a holiday gathering, a special occasion, or just because, this pie is guaranteed to impress.
Ready to wow your family and friends? Gather your ingredients, follow the steps, and let this recipe be the star of your dessert table. Trust me, once you try it, you’ll never go back to a traditional pumpkin pie again!
Creative Serving Ideas for the Milk Bar Pumpkin Pie Recipe
Fun Twists on Serving
The Milk Bar Pumpkin Pie Recipe is already a crowd-pleaser, but adding a little flair to your presentation can make it even more memorable. Here are some fun ways to serve this pie:
- Mini Pies: Use muffin tins to create individual servings. These are perfect for parties or grab-and-go treats.
- Pie Jars: Layer crumbled oat cookie crust, pumpkin ganache, and whipped cream in small jars for a trendy dessert-in-a-jar presentation.
- Pie Pops: Cut the pie into small squares, insert lollipop sticks, and dip them in melted white or dark chocolate for a whimsical twist.
Seasonal Themes
Celebrate the season by decorating your pie with seasonal toppings:
- For Thanksgiving, garnish with sugared cranberries or small edible leaves made from pie dough.
- During Halloween, drizzle melted chocolate in a spiderweb pattern over the pie.
- In winter, sprinkle crushed peppermint candies or a dusting of powdered sugar for a snowy effect.
No matter how you serve it, this pie will look as amazing as it tastes. Don’t be afraid to get creative and make it your own!
Nutritional Information and Storage Tips
Understanding the Nutritional Breakdown
The Milk Bar Pumpkin Pie may not be the lightest dessert, but it’s worth every calorie. Here’s an approximate breakdown per slice (assuming 10 slices per pie):
- Calories: ~350
- Fat: 18g
- Carbohydrates: 40g
- Protein: 5g
- Fiber: 2g
Keep in mind that toppings like whipped cream or caramel sauce can add extra calories, so adjust based on your preferences.
Storing and Reheating Tips
To keep your Milk Bar Pumpkin Pie fresh and delicious, proper storage is key:
- Refrigeration: Always store the pie in the fridge, covered with plastic wrap or aluminum foil. It will stay fresh for up to five days.
- Freezing: Wrap individual slices tightly in plastic wrap and place them in an airtight container or freezer bag. The pie can be frozen for up to two months.
- Reheating: If you prefer a warm slice, reheat individual portions in the microwave for 10–15 seconds. For a more even texture, warm the pie in the oven at 300°F for about 10 minutes.
With these tips, you can enjoy your pie fresh, whether it’s the day you bake it or weeks later. For more dessert ideas, don’t miss our Classic Chocolate Mousse Recipe.

